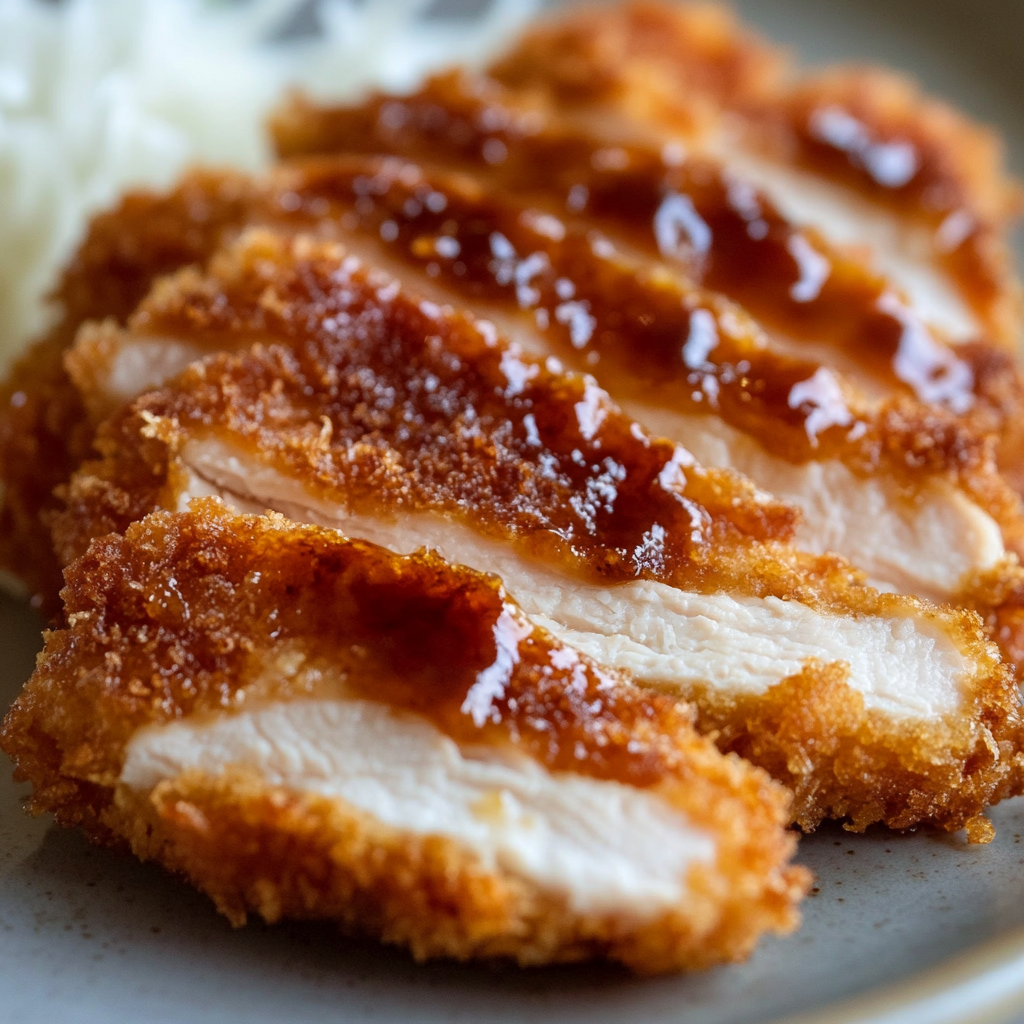
Have you ever experienced the delightful crunch of perfectly fried Chicken Katsu? This Japanese dish captures the essence of comfort food with its crispy exterior and tender meat. Each bite reveals a wonderful contrast in textures while delivering rich flavors that dance on your palate.
Imagine serving this delectable dish at your next family gathering or cozy weeknight dinner. The aroma of frying chicken fills the air, promising an unforgettable meal that everyone will love. As you dip each piece into savory sauce, anticipation builds for an amazing culinary experience you won’t want to miss.
Why You’ll Love This Chicken Katsu
Quick and Easy Preparation: With simple ingredients and straightforward steps, making Chicken Katsu is a breeze even for novice cooks. In less than an hour, you can serve up this delicious dish without spending all day in the kitchen.
Crispy Texture: The key to perfect Chicken Katsu lies in the panko breadcrumbs that create a light and airy crunch. This texture elevates the dish from ordinary to extraordinary, making it a favorite for both kids and adults alike.
Versatile Serving Options: Whether enjoyed as a main course or sliced up for sandwiches, Chicken Katsu adapts well to various meals. Serve it with rice, salad, or noodles for a complete dining experience that suits any occasion.
Flavorful Dipping Sauce: The accompanying sauce adds an extra layer of flavor to the dish. A mixture of soy sauce and other seasonings brings out the best in the crispy chicken, making every bite a delightful sensation.
Ingredients
Here’s what you’ll need to make this delicious dish:
- Boneless, Skinless Chicken Breasts: Use about 3-4 breasts for serving 4 people; ensure they are evenly sized for uniform cooking.
- Panko Breadcrumbs: These Japanese-style breadcrumbs provide the signature crunch; look for them in international sections or specialty stores.
- All-Purpose Flour: A light dusting of flour helps the egg wash adhere better to the chicken before coating it in panko.
- Eggs: Beaten eggs act as glue for the breadcrumbs; use large eggs for best results.
- Cooking Oil: Choose neutral oil like vegetable or canola oil for frying; it has a high smoke point suitable for deep frying.
For the Sauce:
- Soy Sauce: Opt for low-sodium soy sauce; it balances flavor without overpowering the chicken.
- Mirin: This sweet rice wine enhances taste; substitute with sugar if unavailable.
The full ingredients list, including measurements, is provided in the recipe card directly below.
How to Make Chicken Katsu
Follow these simple steps to prepare this delicious dish:
Prepare Your Ingredients : Gather all ingredients beforehand to streamline cooking. Slice chicken breasts horizontally into thinner cutlets if necessary, ensuring even cooking during frying.
Set Up Your Breading Station : Place three shallow bowls on your countertop. Fill one with flour, another with beaten eggs, and the last with panko breadcrumbs mixed with salt and pepper.
Bread The Chicken : Dredge each piece of chicken in flour first, shaking off excess. Then dip into beaten eggs, allowing any excess to drip off before finally coating it thoroughly with panko breadcrumbs.
Heat Oil In A Pan : In a large skillet over medium heat, add enough oil to cover the bottom generously—about half an inch deep. Heat until shimmering but not smoking (approximately 350°F /175°C).
Fry The Chicken Cutlets : Carefully place breaded chicken cutlets in hot oil without crowding the pan. Fry for about four minutes per side until golden brown and cooked through (internal temperature should reach at least 165°F /74°C).
Drain And Serve : Once cooked, transfer cutlets onto paper towels to absorb excess oil. Serve immediately with dipping sauce drizzled on top or alongside—for that perfect finishing touch!

Tips and Tricks
Here are some helpful tips to ensure the best results for your dish:
Select Fresh Ingredients: Always use fresh chicken breasts and quality toppings like panko breadcrumbs for optimal flavor and texture.
Avoid Overcrowding The Pan: Fry cutlets in batches if necessary; overcrowding lowers oil temperature leading to soggy results rather than crispy perfection.
Maintain Oil Temperature: Keep an eye on oil temperature while frying—too low results in greasy chicken while too high can burn breadcrumbs before cooking through.
Add Seasoning To Panko Breadcrumbs: Enhance flavor by mixing spices such as garlic powder or paprika into panko before breading—a small change can elevate overall taste dramatically.
Rest After Frying: Allow fried cutlets ample time on paper towels after cooking—it helps maintain crispiness by eliminating excess grease effectively!
Mistakes to avoid
Not preparing the chicken properly
One common mistake when making Chicken Katsu is not preparing the chicken correctly. Always ensure that you pound the chicken breasts to an even thickness. This step helps them cook evenly and prevents some parts from being undercooked while others become dry. If you skip this, you risk ruining the texture and flavor of your Chicken Katsu. Use a meat mallet or rolling pin, cover the chicken with plastic wrap, and pound gently until about half an inch thick for best results.
Using the wrong type of breadcrumbs
Another frequent error is using the wrong type of breadcrumbs for Chicken Katsu. Traditional recipes call for panko breadcrumbs, which offer a light and crispy texture. Regular breadcrumbs can make your coating dense and soggy, diminishing the dish’s quality. Always opt for panko to achieve that authentic crunch. If you can’t find panko, consider making your own by processing stale bread in a food processor until coarse and airy to mimic the desired texture.
Overcrowding the frying pan
Overcrowding your frying pan is a significant misstep when frying Chicken Katsu. When you add too many pieces at once, it lowers the oil temperature, leading to greasy and unevenly cooked chicken. Instead, fry in batches to maintain consistent heat throughout the cooking process. This method ensures each piece gets adequately crispy and golden brown without absorbing excess oil. Aim for about two to three pieces per batch depending on your pan size for optimal results.
Skipping the resting time
Many people overlook the importance of resting time after frying Chicken Katsu. Skipping this step can result in a loss of juiciness as well as a less appealing texture. After frying, let your Chicken Katsu rest on a wire rack or paper towels for about five minutes before slicing or serving. This allows any residual heat to redistribute within the meat, ensuring each bite remains tender and flavorful while preventing sogginess from steam buildup.
Serving Suggestions
This Chicken Katsu is versatile and pairs wonderfully with a fresh cabbage salad. The crispness of the cabbage complements the tender chicken beautifully. Simply toss shredded cabbage with a light vinaigrette for an easy side dish. This combination creates a delightful balance of flavors and textures, making every bite enjoyable.
Another great serving suggestion includes steamed rice. The fluffy rice absorbs the savory sauce from the Chicken Katsu, enhancing its rich flavor. You can serve it plain or mix in some sesame seeds for added crunch. This classic pairing is sure to satisfy your hunger and provide a hearty meal option.
If you’re looking for something refreshing, consider adding pickled vegetables. Their tangy taste contrasts nicely with the crispy chicken, providing a burst of flavor in each bite. You can use store-bought pickles or make your own by soaking cucumbers or radishes in vinegar, sugar, and salt for a quick pickle.
Lastly, a side of miso soup is an excellent choice. This warm, comforting soup offers umami richness that complements the Chicken Katsu perfectly. Prepare it by simmering dashi stock with miso paste and adding tofu and seaweed for texture. It’s a cozy addition that rounds out your meal beautifully.

FAQs
What is Chicken Katsu?
Chicken Katsu is a Japanese dish featuring breaded and deep-fried chicken cutlets. The chicken is typically coated in panko breadcrumbs, giving it a crunchy texture on the outside while remaining juicy on the inside. It’s often served with tonkatsu sauce, which adds a sweet and savory flavor to the dish, enhancing its overall appeal.
How do I make Chicken Katsu crispy?
To achieve perfectly crispy Chicken Katsu, ensure you use panko breadcrumbs rather than regular breadcrumbs. Panko creates a lighter and crunchier coating. Additionally, let the breaded chicken rest before frying to help the coating adhere better. Fry in hot oil at around 350°F (175°C) until golden brown for optimal crispness.
Can Chicken Katsu be made ahead of time?
Yes, you can prepare Chicken Katsu ahead of time! Bread the chicken cutlets and refrigerate them until you’re ready to fry. For best results, fry them just before serving to maintain their crispiness. If you have leftovers, they can be stored in an airtight container in the refrigerator for up to two days.
What sauces pair well with Chicken Katsu?
Tonkatsu sauce is the traditional accompaniment for Chicken Katsu due to its sweet and tangy flavor profile. Other delicious options include soy sauce mixed with lemon juice or even a spicy mayo for an added kick. These sauces enhance the dish’s flavors while providing varied taste experiences.
Conclusion
In summary, Chicken Katsu is a delightful Japanese dish known for its crispy texture and savory flavor profile. By using panko breadcrumbs during preparation, you ensure that each bite remains light yet satisfying. Pairing this dish with fresh sides like cabbage salad or steamed rice enhances your meal’s overall experience significantly. Don’t forget about dipping sauces; they add complexity to each bite as well! Whether you’re cooking it for family dinners or special occasions, this recipe is sure to impress everyone at your table. Enjoy your culinary adventure with this delectable dish!

Delicious Chicken Katsu
- Total Time: 35 minutes
- Yield: Serves 4
Description
Chicken Katsu is a delightful Japanese dish that combines tender chicken with a crispy, golden-brown exterior created by panko breadcrumbs. This flavorful meal offers a satisfying crunch followed by juicy, seasoned meat in every bite. Perfect for any occasion, Chicken Katsu can be served as a main course or sliced for sandwiches, making it versatile and family-friendly. Pair it with a savory sauce and fresh sides like cabbage salad or steamed rice for a complete dining experience. Whether you’re hosting friends or enjoying a cozy family dinner, this easy-to-make dish is sure to impress everyone at the table.
Ingredients
- 3–4 boneless, skinless chicken breasts
- 1 cup panko breadcrumbs
- ½ cup all-purpose flour
- 2 large eggs
- Cooking oil (vegetable or canola)
- ¼ cup low-sodium soy sauce
- 2 tablespoons mirin
Instructions
- Slice chicken breasts into uniform cutlets for even cooking.
- Set up a breading station with one bowl of flour, another with beaten eggs, and the third with panko breadcrumbs mixed with salt and pepper.
- Dredge each cutlet in flour, dip in egg, and coat thoroughly with panko.
- Heat oil in a large skillet over medium heat until shimmering (approximately 350°F/175°C).
- Fry the breaded chicken cutlets for about 4 minutes on each side until golden brown and cooked through (internal temperature of at least 165°F/74°C).
- Drain on paper towels before serving.
- Prep Time: 15 minutes
- Cook Time: 20 minutes
- Category: Main
- Method: Frying
- Cuisine: Japanese
Nutrition
- Serving Size: 1 serving
- Calories: 370
- Sugar: 0g
- Sodium: 650mg
- Fat: 18g
- Saturated Fat: 3g
- Unsaturated Fat: 13g
- Trans Fat: 0g
- Carbohydrates: 28g
- Fiber: 1g
- Protein: 31g
- Cholesterol: 95mg

